Overview
The Management Accounts Suite is an Excel based application which uploads accounting information from Navigator and formats into a presentable Management Accounts pack.
A standard Management Accounts pack is used for this process, and it is recommended in the initial stages of implementation that this is used.
This documentation relates to V2.9 and above of the Management Accounts Suite - earlier versions may differ.
The standard pack provides the following pages for analysis :-
LOC Summary for the dealership
VS Summary for the Vehicle Sales Department
NR New Vehicles – Retail Sales Detail
NF New Vehicles – Fleet Sales Detail
NM New Vehicles – Motability Detail
NA New Vehicles – Agency /(Manufacturer Direct) Commission only Sales
UV Used Vehicles Detail
P Parts Department Detail
S Service Department Detail
I Indirect Expenses Detail
BS Balance Sheet
The remainder of this document is split into 3 sections :-
1. Setup of initial Management Accounts for first time use
2. Monthly Processing
3. How to maintain/adjust management accounts to individual requirements
Setting up Management Accounts
To setup the Management Accounts, first open the Management Accounts Application which is an Excel Spreadsheet titled Management Accounts V2.9xlsm.
When opened, the spreadsheet looks as follows :-
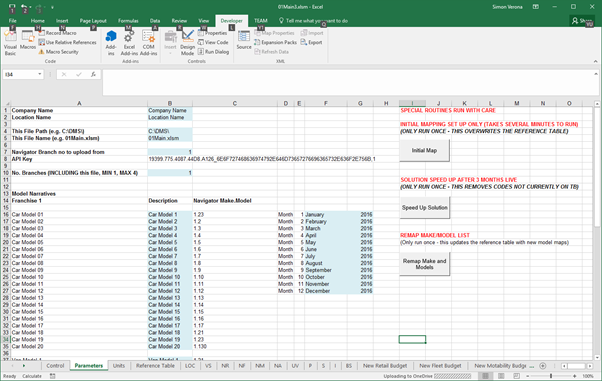
Click on the “Parameters” sheet (as shown above).
At the top, fill in the Company and Location (Dealership) name. These are used for headings when printing out the Management Accounts.
Fill in the months/years for the Period end dates for the current year (eg if the year end is December, this will be January through to December).
Fill in the Navigator Branch no and API Key (which will be supplied by the Navigator Helpdesk or your DMS Project Manager). The branch no can be any Navigator branch no within the company that is being reported on.
Fill in the descriptions of the Car models that require analysis on the Vehicle section of the Management Accounts (eg for a Ford dealership this may be KA, Fiesta, Focus, Mondeo etc).
Next to each of the models is the Navigator Make.Model for the model in question. This should be able to obtained from the Navigator Trial balance (it is the last two parts of the nominal code). Please refer to you Navigator Implementation consultant or Project Manager.
Loading the Initial Accounts Mapping Table
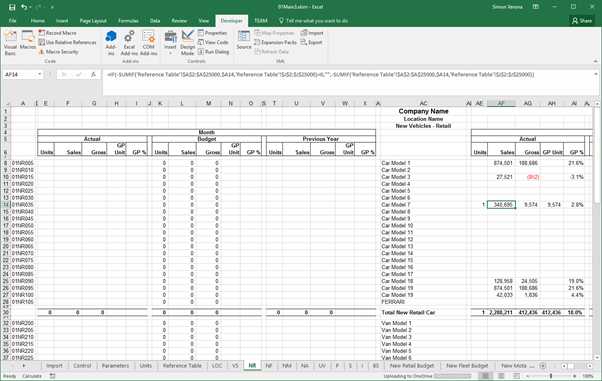
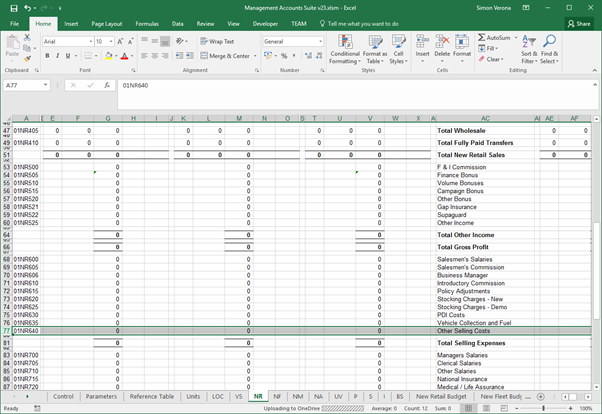
The Management Accounts spreadsheet relies on “mapping” of Navigator nominal codes to codes used on the Management Accounts sheets. For example, looking at the New Car – Retail (NR) sheet :-
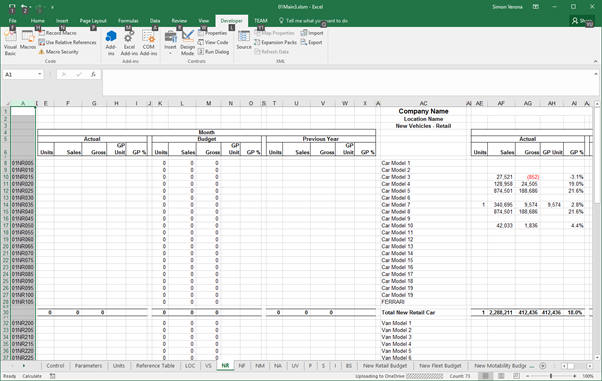
The codes are in the first column – Ie 01NR005 is the code relating to the sales of Car Model 1.
Navigator is supplied with a “standard” accounting setup, and as such there is a standard mapping for all possible nominal codes to the relevant lines on the Management Accounts.
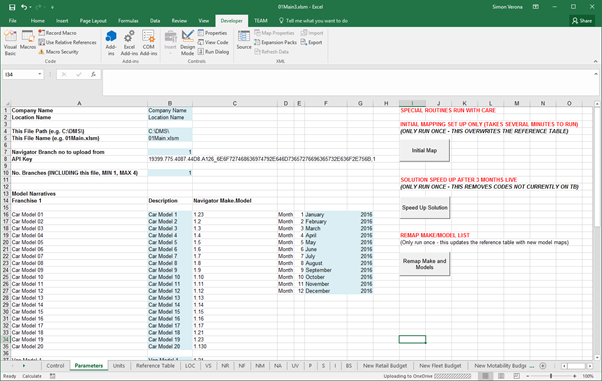
This is loaded by clicking the “Initial Map” button on the Parameter Sheet:-
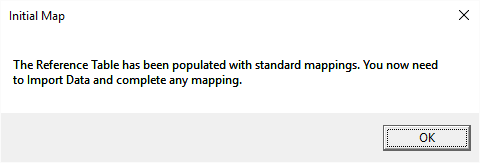
This takes a few seconds and will then display the following:-
Updating for Make & Model mapping list
To apply a conversion to the Make.Model mappings to the standardised map you will then need to click the “Remap Makes and Models” button on the Parameter Sheet.
This takes a minute or two to process.
This may display a message when complete :-
To complete the first set of Management Accounts continue onto the Monthly processing section which follows:-
Processing Monthly Management Accounts
Loading Nominal Ledger Report
The first step each month is to load the Nominal Ledger from Navigator and to process this through the mapping table, Inevitably there will be some nominal codes that are in the trial balance which are not mapped as standard and these will need manually mapping.
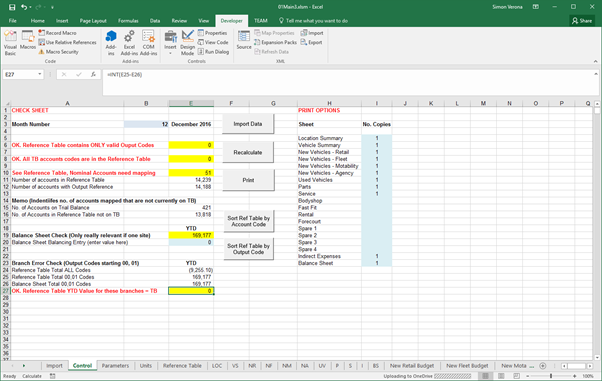
To load the Navigator Nominal Ledger, click on the Control Sheet :-

First, ensure that the Month No at the top left of the sheet is the correct nominal ledger period that requires to be reported on. The click “Import Data”.
This may take up to 5 minutes or more to complete.
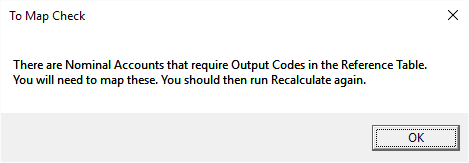
When complete, a message box will be displayed which will be informing that there are nominal codes that require mapping. (If the message isn’t displayed it means that all nominal codes are already mapped and you can skip the next step!).
Mapping Unmapped nominal codes
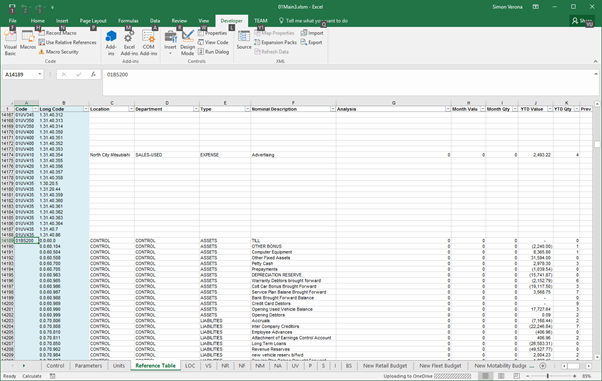
Once the nominal ledger has been imported, Excel will automatically switch to the “Reference Table” sheet. This sheet contains all of the nominal codes on the trial balance and links them to the line on the Management accounts that they apply to:-

The cursor will already be in the box for entering the mapping code for the first unmapped line. (see above).
To enter a code there are two options. Either manually enter the code, or click in the cell and press CTRL+s (ie press the CTRL key and the letter s at the same time). If you do this, the following is displayed :-
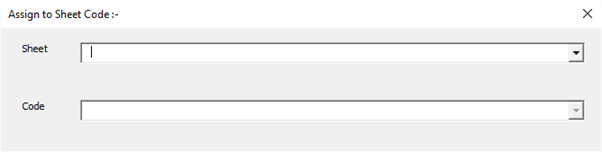
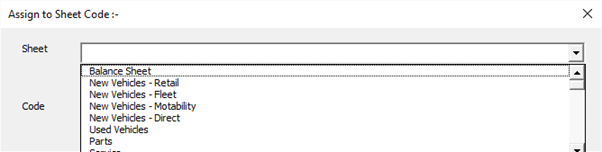
Select which Management Accounts sheet from the list (eg Balance Sheet). This will then populate the “Code” list with all the lines on the relevant sheet to select from. Selecting this will then insert the correct code into the mapping table. For example, if the code was a Cash in Hand account which should appear on the Balance sheet. Select “Balance Sheet”) from the list of sheets:-
Then select the line for “Bank and Cash in Hand”:-
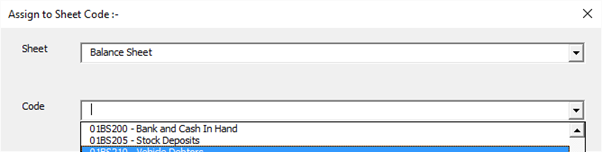
This will insert the code (“01BS200”) into the mapping table:-
Repeat this for all unmapped lines.
Recalculating the Management Accounts
Once this has been done, the Management Accounts will need recalculating. This is carried out by clicking the “Recalculate” button on the Control sheet:-
Confirm all accounts are mapped
The control sheet provides a lot of information relating to the mapping tables.
The key item to check is the “See Reference Table, Nominal Accounts need mapping” box – this should be zero when all lines on the accounts are mapped correctly.
In addition, to ensure there are no mapping errors caused by keying errors, the bottom line should say “OK. Reference Table YTD Value for these branches = TB” . If it says anything else, it means that there is an error in the mapping table.
Review the Accounts
The accounts can be reviewed by clicking through the departmental sheets. If an issue is discovered, it is likely that the list of nominal codes from the trial balance that are included in the line can be displayed. This can be done as follows :-
Firstly, click on the line that is required to be reviewed :-
Then press ctrl-u (ie the Ctrl and the “u” key on the keyboard together). This will display the following :-
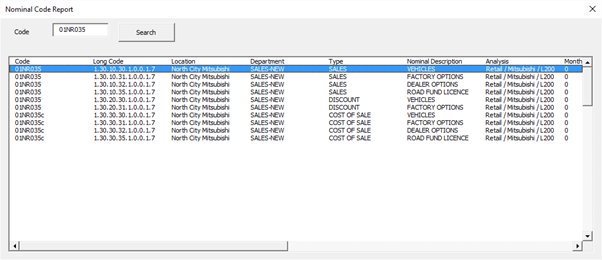
Which is the list of all the nominal codes (and the values of each if the screen is scrolled to the right) that are mapped to this line.
If there is an error, then to remap a code, switch back to the “Reference Table” and find the nominal ledger code – changing the Management Accounts code that it maps to (either by manually entering or by selecting using ctrl+s)
Printing the Management Accounts
The Management accounts can be printed from the Control Sheet by clicking on the “Print” button.
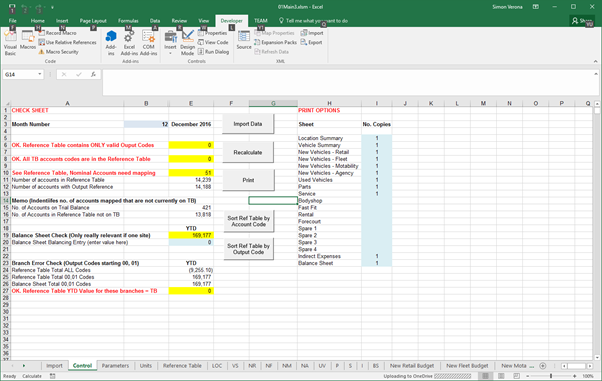
To the right of the print button is a list of all the sheets available to print. The no of copies of each can be entered next to the sheet (leaving blank will not print the sheet which is useful to exclude departments that don’t apply to the dealership).
Modifying Management Accounts Layout
There are two ways of modifying the layout of the Management Accounts.
Adding a Line to a Reporting Page
The first is to add an extra line to a reporting page. This is simple done by creating a new line by copying and pasting an existing analysis line and changing the Analysis Code. It is also required to add a reference to the analysis sheet so that the new line works in the lookup macros.
Eg adding a new expense line to the New Vehicle Retail Page:-
Before Adding Line
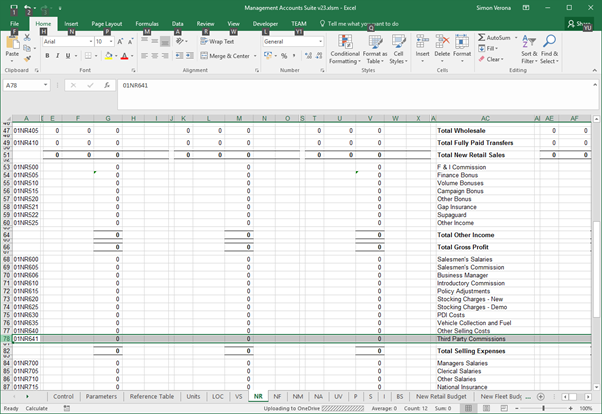
Copy and Paste a line (Line 77 in this case)
Highlight a row and right click, choosing the “Copy” option, then right click the row to paste to and click “Insert Copied Cells”

Change Analysis Code and Description
Add to Valid References Table
Right-click the sheet tab at the bottom and choose the UnHide option :-
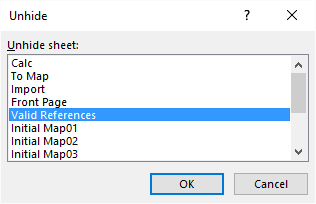
Select “Valid References” and click OK to unhide.
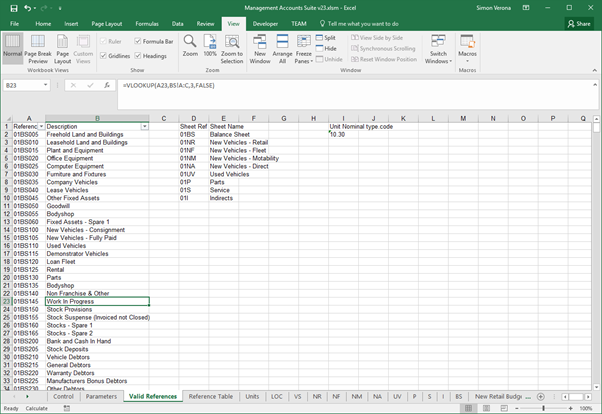
Columns A & B contain the list of Output codes from the reporting sheets and the corresponding descriptions.
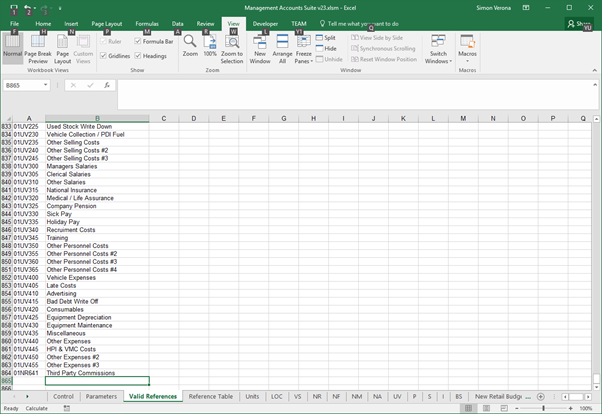
Scroll to the bottom of the list and add the new code and description:-
Scroll back to the top and select the option to re-sort by Column A so that they are then sorted back into order.
Right click the “Valid References” tab and choose the Hide option.
Adding a new Management Accounts Reporting Page
This can be done, by copying and pasting an existing page. All Output codes in column one should be changed to a new prefix (eg 01NEWxxx”).
On the Valid References sheet, in columns D & E the Prefix (eg 01NEW) and a description of the sheet should be entered.
The Management Accounts reporting page can then be formatted as required and mapped using the standard macros in the Reference tab.