To add/amend a Part Exchange on a Sales Order to the Navigator Main menu and select Vehicles. In the drop down menu that appears select Vehicle Administrators Toolkit.
The following window will appear:
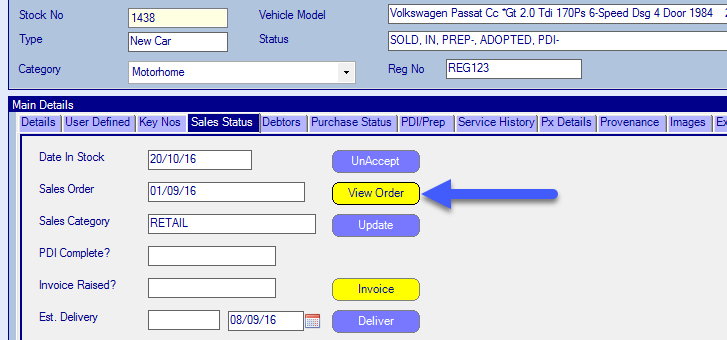
Search for the required Stock Record. When the Stock Record appears on screen select the Sales Status tab and click the button for View Order.
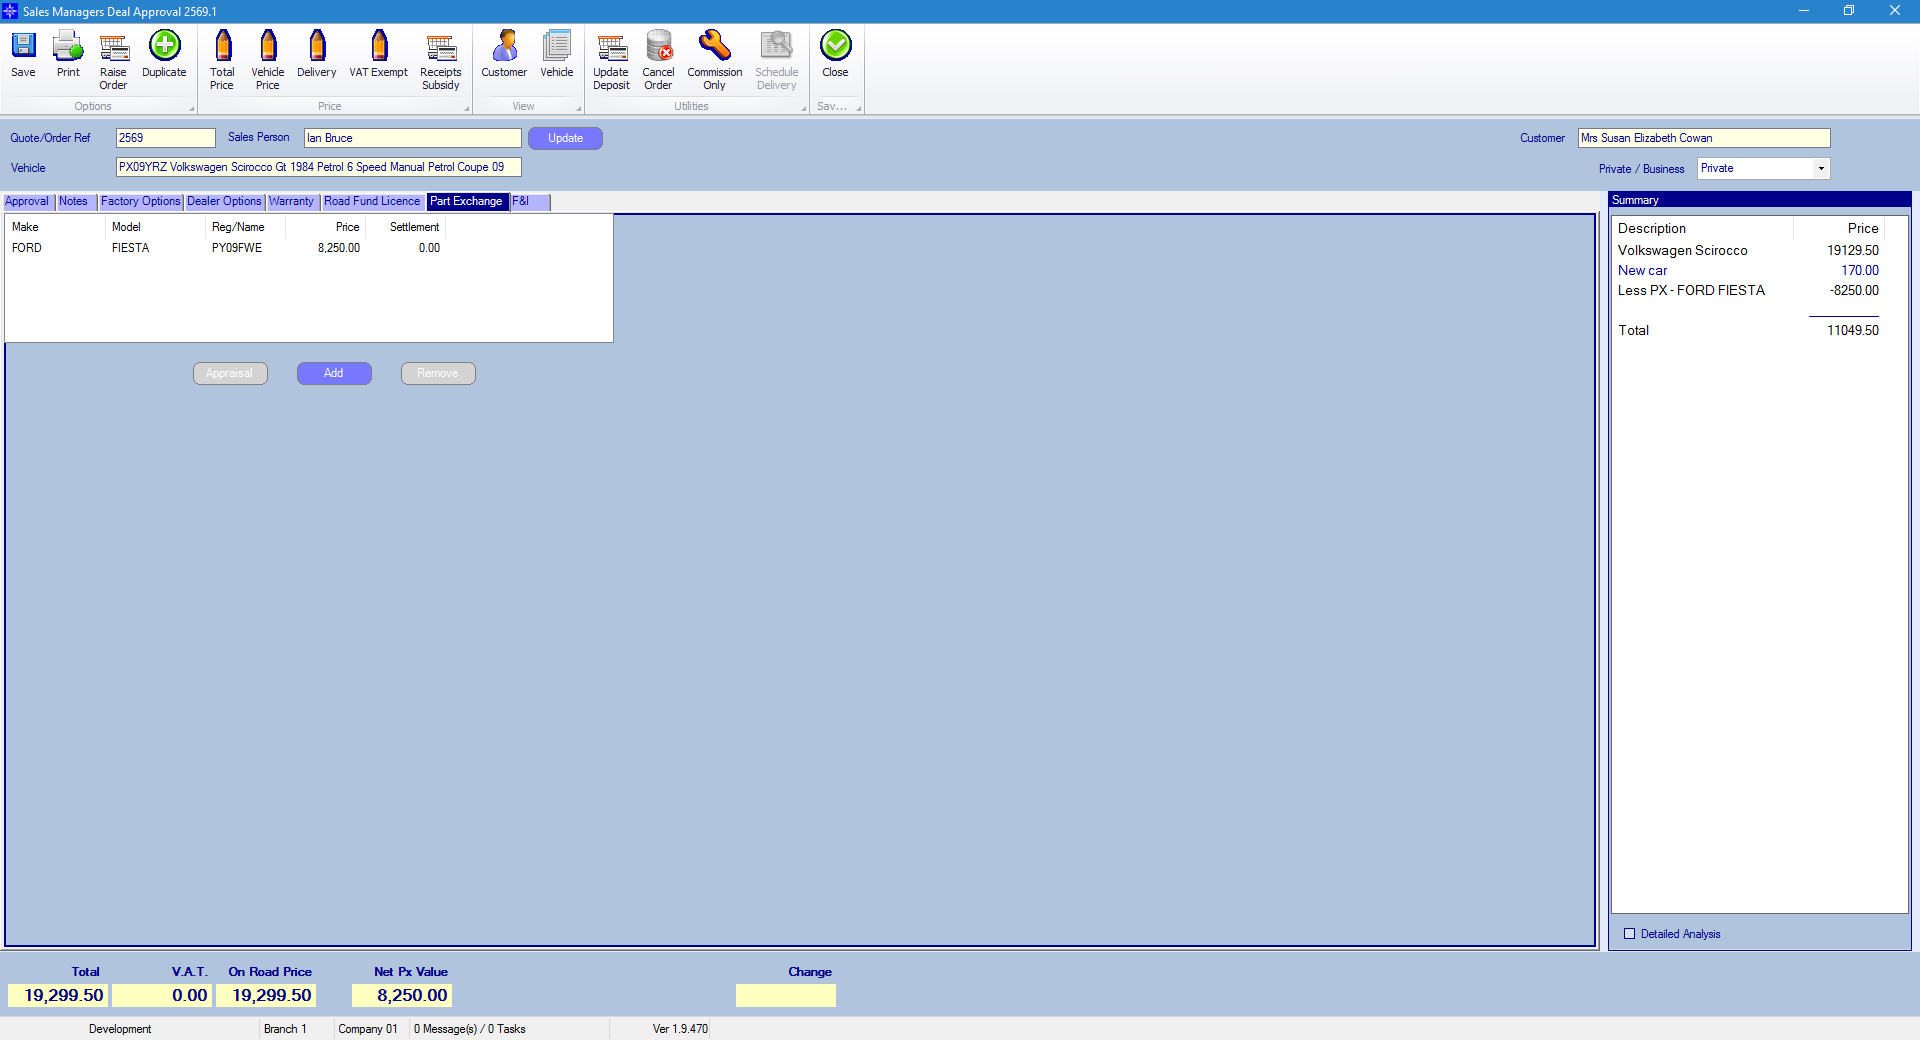
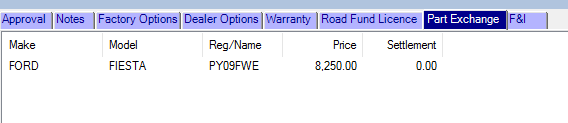
The Sales Order will then appear on screen. Select the Part Exchange tab and the window that appears will look similar to the below:
To add a Part exchange select the Add button. The following window appear:
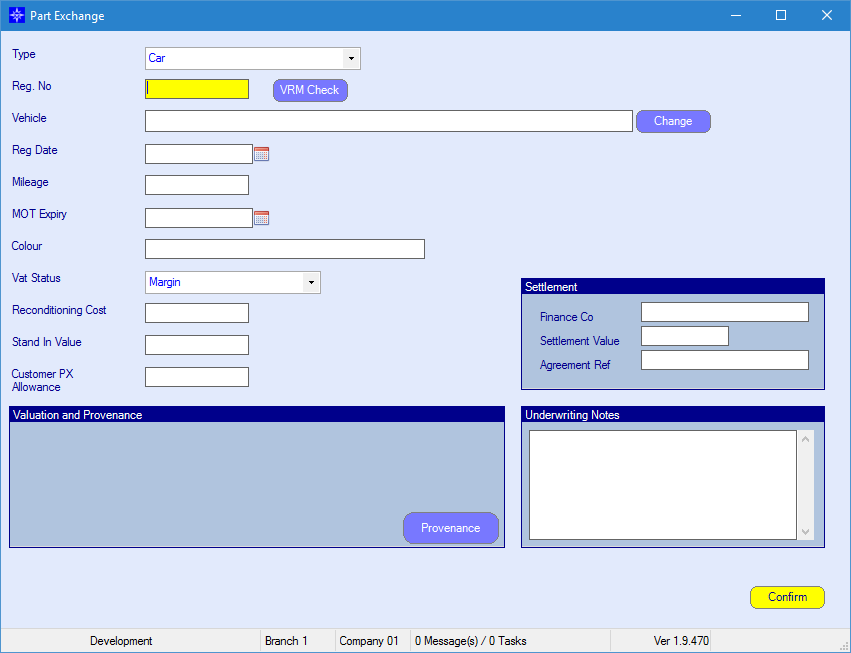
Enter the registration number and select the VRM button. This will automatically retrieve the vehicle details.
The vehicle details can be amended by selecting the Change button.
Enter the mileage, MOT Expiry Date, Vat Status, Reconditioning Cost, Stand in Value and the Customer PX Allowance.
If the Stand in Value differs to the Customer PX allowance an an over/under allowance will be posted to the host deal.
If there is any remaining settlement on the part exchange, then fill in the Settlement section.
Once complete, select the Confirm button. The Part Exchange will now appear on the Sales Order. An example is shown below:
You can add as many part exchanges as you like.
If you want to remove a part exchange highlight the required line on the Sales Order and select remove. This will then remove the PX from the Sales Order.